Asterix Walkthrought
So, Asterix on the SNES — the very same Asterix plenty of us just called “the Asterix game” or “Asterix on Super Nintendo.” What follows is a straight-up walkthrough: where to move, how to pop secrets, and how to dismantle bosses. We’ll go world by world, no fluff — just solid pointers so our mustachioed Gaul reaches the credits without frayed nerves.
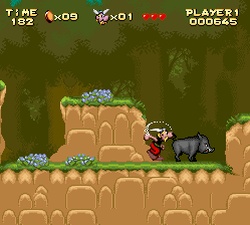
Gaul: forest, river, and the first Roman camps
The opener’s about precision, not speed. In the forest screens, keep a steady jump rhythm: spear Romans have a tiny window after their thrust animation — tag them up close the moment the lunge finishes. The treetop lookout spots look empty — check the left edge of each: there are two invisible alcoves with helmets and a heart. First “secret” breakable wall is just right of the waterfall: looks like a plain ledge, but hit the lip and the masonry cracks — extra life inside.
On the river, don’t rush the barrel platforms. The one with a faint dark rim sinks faster than the rest — hit it last in any chain. For the long three-barrel leap in the current, take a run-up from the upper bank: Asterix’s long jump only kicks in at top speed, otherwise you’ll come up short. Under the guarded footbridge, check the lower edge: dropping into the water isn’t lethal, and there’s a tucked-away cache to the right under the bridge with helmets. The current will carry you back to your starting shore.
The first Roman camp rewards a habit of “poking” walls. Left of the gate there’s a tent with a slightly lifted flap — slip in from the back to find a heart barrel. Wall catapults arc their shots; move between the shadowed impact zones in short bursts. The gate throws two centurions at you: pull them one by one. Their shield fully covers the front only in the opening phase — roll through to their back from a nearby ledge, hit, disengage, repeat.
Helvetia: ice, rope bridges, and downhill slides
Snow stages feel slick and “buttery”: you’ll need extra stopping room. Get comfy with feathered taps. The first snowy chute that drops you down isn’t a trap: jump at the last step and it’ll fling you to an upper ledge with a secret. On hanging bridges, gusts will shove you around: stand on the middle plank and count by the flag’s animation on the right — gust-step-gust. On the third cycle, make your run. Under an icy niche with icicles is a hidden corridor: crack the right wall, but knock the icicles first or the recoil punts you into the pit.
Rolling log “drums” come in sets of 3–4. On the first slope, count it out: pause, small log, big log, pause — your window is right after the big one. Just below that slope is an invisible platform to the left: from there, hop up to a bonus “room” with a heart and helmets. On the frozen waterfall section, ice platforms don’t vanish instantly — two blinks, then they drop. Do short hops with the blink rhythm “one-two,” then on “three” move to the next.
Egypt: pyramids, sliding blocks, and arrows
Inside the pyramids, Asterix hits compact rooms with moving tiles. Remember: the tile with an eye points the right way; the scarab tile is a trap or dead end. In vertical shafts, don’t jump mid-center — arrow tips fire on a timer from the walls. Stand on the lip, wait for the shot, quick drop two tiles, pause, then drop again. There’s a spot with two rows of spikes and a single intact tile in the middle — that one’s fake: break the lower row near the left side to reach a bonus with extra lives.
Pot-maze room: don’t smash everything at once — two pots on the left hold switches that arm a hidden door on the right. If you crack them first, the door won’t enable. Go left-to-right: first the top far-left pot, then the lower pot second from the right — you’ll hear a click. That opens a portal on the right wall. In sandy galleries, sliding blocks lunge suddenly: step in to bait the slide, step back, then dash through the gap. On one ceiling, a “drippy” tile stands out — an upward strike opens a shaft to a secret.
Pirate ship: ropes, barrels, and cover
On deck, keep it lateral: climbing the masts can send you into a needless loop. Crosswise ropes swing — jump at the bottom of the arc for less carry. Skull-marked barrels explode a second after you hit them; use them like proximity mines: smack, step away, lure an enemy into the blast. At the bow there’s a “blind” ladder along the starboard side — you’ll walk on air, but the hand icon cues a grab. There’s a 1-up there.
The midship miniboss loves tossing an anchor on three lanes. No gimmicks needed: stand slightly aft of center, hop the low toss, duck the high one, sidestep the mid-height. After three throws he pauses and exposes himself — that’s your window for two or three hits. Three cycles and he goes overboard.
Rome: fortified courtyards, arches, and the “top brass”
Rome’s arched chambers play vertical. Tower archers shoot at 45 degrees; it’s easier to clip them with short hops from the neighboring arch than to climb straight up the ladder — wall blades lurk right at the exits. In the square with Caesar statues, approach from the left: behind the statue there’s a fine crack — strike to reveal a narrow corridor to a heart. Courtyard catapults fire in a “low-mid-high” burst — on the high shot, get onto the lower ledge and move forward.
Before the big boss, there’s a room with two lifts and “hammers.” Don’t try to squeeze through the bottom route — the upper path is safer. On the first lift, count two steps down, one up, jump to the right platform, then immediately angle left — the ceiling trap will whiff. The final shaft with pillars is capped by a fake floor on the right edge — break it to cut the corner and skip one hammer entirely.
Bosses: patterns, openings, finishing touches
The Gaul centurion hides behind his shield: bait his running swing — he loses stance and exposes the left side. Two clean hits, back off, repeat. In Helvetia, the camp captain throws torches at three heights: hug the wall, they’re easy to hop, and when he steps in, a point-blank punch is safe and quick.
The Egyptian guardian lands where you stood half a second ago. Keep tracing small figure-eights, never stand still, and wait for the hover after his third jump — then punish. On the ship, the barrel pirate shifts phase at half health: stops straight throws and switches to arcs — stay near the rail, the arcs peak higher there, making them easier to duck under. The Roman officer calls in adds near the end: don’t brawl the whole pack, peel soldiers one by one while keeping the officer at the screen edge, then delete him once he’s alone.
Don’t skip helmets along the way — they feed bonus stages and cushion your score. In cauldron rooms you’ll sometimes get a short bonus where you can trade your haul for lives: grab what you need and bank the rest for the next world. Passwords after major sections let you return without a full redo — snap a pic or jot them down, but don’t rush it: sometimes it’s smarter to snag one more life on the world’s final screen and only then lock in the code.
If things go sideways, revisit the level and probe the screen edges for secrets: Asterix loves hiding corridors in walls offset by half a tile, and invisible platforms are often parked exactly two jumps up from the bottom edge. Keep that rhythm and the run gets much smoother. And yeah, whatever we call it — Asterix, the moustached Gaul’s adventure, or just “that Asterix game” — it all comes down to pattern mastery and sharp eyes. Romans hate that.